At Badsender we are sharing! Yes we like not to leave our drawers locked. It's our DNA and also this will of transparency on our work.
This article will focus on the HTML kit you receive and put in your routing tool or check that the one that routes for you sends a quality email.
This isn't to turn you into a stasie marketing general, but after all, it's always good to know how to check what you've ordered. Especially if you use a builder or a service provider, because that's not your job. The aim is to improve your e-mails in your marketing campaigns.
An important reminder!
When you're running email campaigns, there's bound to be a whole series of actions and processes involved. All this, combined with the right way of doing things, will affect your deliverability.
It's a bit like building a car. The email is like the engine. So we must not neglect it ! You can have the best data, a great campaign tool, top servers, ... but email is the last link, received by all your customers.
It is therefore a question of having something that can hold up: not impacting your deliverability, not impacting your customers in the negative sense of the term, having a code that does not look like spam, ...
In short, not to have built a racing car and end up installing a moped engine.
Let's fasten our seatbelts, and roll my chicken 🙂
Follow the GPS!
1- Retrieve your code
3 possibilities :
- I get an HTML kit
- I can download my kit via my builder
- If someone sends me a proof, I click on 'See in browser' or 'See online', ...
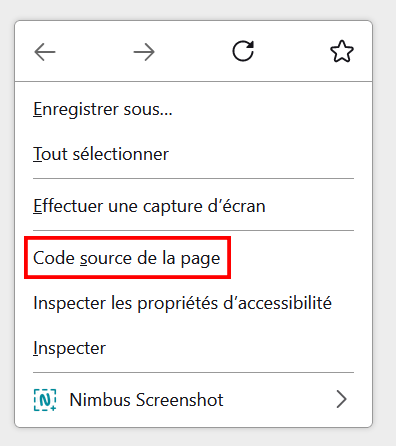
Once in the browser, you can retrieve the code with a right click:
I copy the whole thing (Ctrl+A then Ctrl+C). Now I have to insert this code in an HTML editor.
HTML editing tools are available and necessary. Here at Badsender, we work mostly with Visual Studio Code or Dreamweaver. But here is an interesting site that gives the free tool that will suit you: https://kinsta.com/fr/blog/editeurs-html-gratuits/
Notepad++, Sublime Text, Visual, ... you name it.
2- Checking the weight of the kit or email
A) HTML:
Once saved, or if you have decompressed the kit, you can immediately know the weight of the email. Pure HTML without images:
This weight must not exceed 102kb. This is the weight limit for Gmail which will truncate the email and take you to an inbox where the code is interpreted in a particular way.
102kb is already a significant weight, most emails do not exceed this limit if the code is clean. Even for an already massive newsletter.
B) Images:
If I have a complete HTML kit I can see the total weight of the images. We set a standard at 500kb, which is already very correct. If we exceed it, either we have a lot of images or animated gifs, or the images are not optimized in size or weight.
Don't lose sight of the fact that everything that is in text should be in text and not in images. So for example if you come across CTAs or titles in images, there is something to review!
If the images are hosted and not visible apart from the email then I do a little picking to realize the weight. You have to locate the images and type their physical addresses directly into the browser (src= " "). For example: https://live.lepatron.email/badsender/template_newsletter/lepatron_black_01.png. With a right click you save the image on the computer and then you can look at its weight. You can get a quick estimate of the total weight of the images.
3- Checking the code
Well, often it's a mess and the goal is not to become a coder...
We'll go in stages:
1- If the code is not well organized ==> format the code with https://www.freeformatter.com/html-formatter.html or https://www.tab-it.fr/ . This will allow to organize all this and to indent the code well.
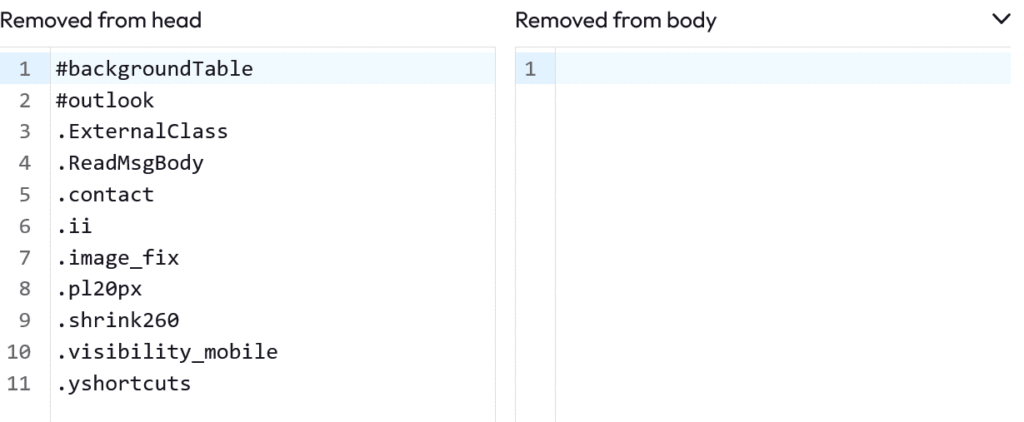
2- Check and clean the css ==> https://codsen.com/os/email-comb/play. Once the code is entered in the left window, the results are displayed at the bottom right.
We have the number of useless classes divided into 2 categories: in the <header> and in the <body>. Just pull down the arrow (framed in red on the image above) to learn more.
So we end up with a few more 'classes' ok. Especially since here the 7th 'class' is useful formatting for the email. On the other hand if you end up with a lot of extra css (like in this example : Adidas email analysis), there must be a problem.
The css has clearly not been optimized. All the classes that make up the email through a builder are not necessarily cleaned up. If your email exceeds 102kb it is a possible explanation.
Emailcomb cleans up the css in 2 clicks if needed. Be careful to test the email if you do it and/or make a backup.
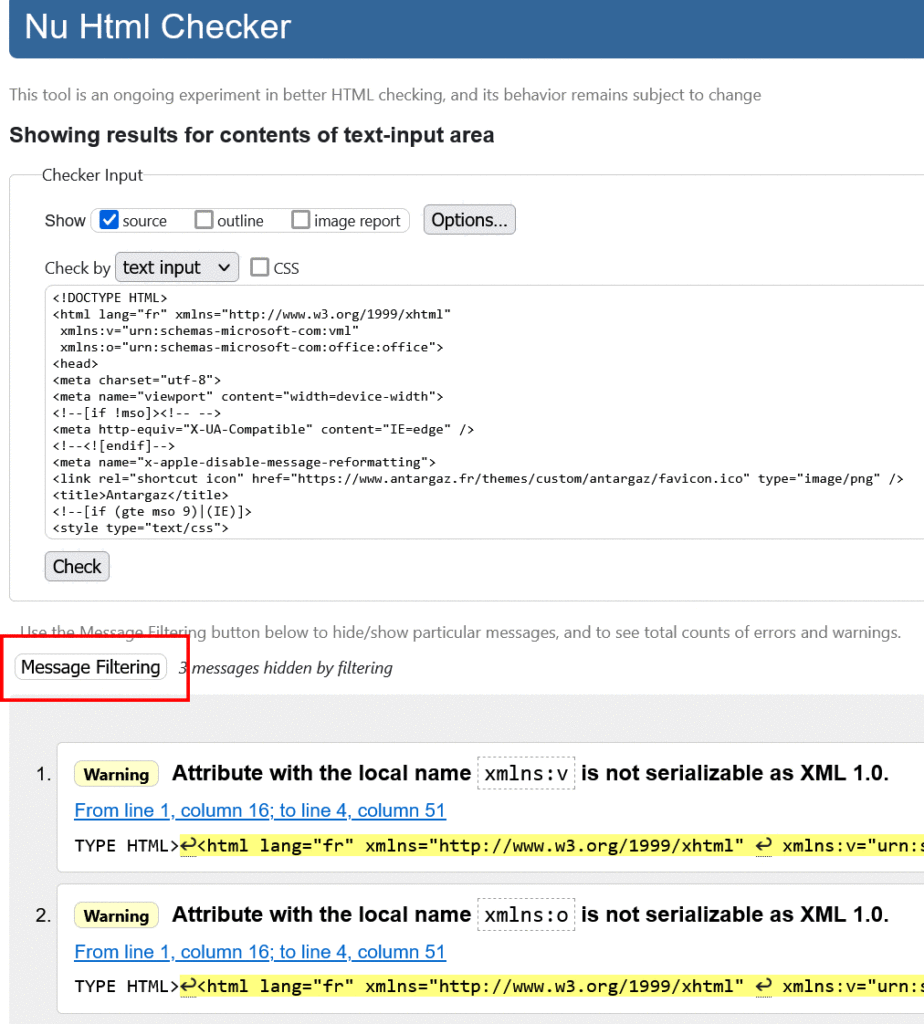
3- Check the validity of the code ==> https://validator.w3.org/#validate_by_input
We inject the code directly and W3c Validator analyses it. It is not a panacea but we can detect some anomalies. We even have the lines where errors are located. You just have to click here :
Need help?
Reading content isn't everything. The best way is to talk to us.
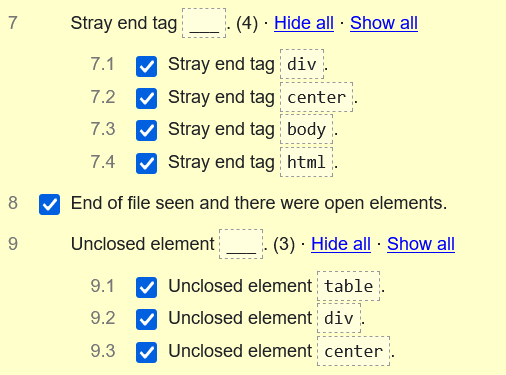
And the errors are more readable:
This allows to see if some tags are not closed. Be careful there are often a lot of 'warning' but it is not necessarily an error. And even if it is more web oriented than email oriented, it can be useful.
4- Verification of accessibility
To review if needed: https://www.badsender.com/2019/01/23/accessibilite-emails/
1- Locate the image tags <img> and check if the alt (alternative text) are present.
On the other hand I also invite you to open your email without the images. Beyond accessibility, this allows you to see how it displays when the images are not displayed!
Either it is possible to open the htm of the kit not unzipped and the images are not displayed. Very practical as tips^^
Either we can 'break' the links of the images in the code and read the HTML. Ex: <img src=" »images/logo.jpg »" width=" »113″" height=" »48″" alt=" "My" logo »>I remove the 'images' everywhere (at once with a replace all) to break the link: <img src=" »logo.jpg »" width=" »113″" height=" »48″" alt=" "My" logo »>. Then a little backtracking restores the initial situation.
2- Find out if your tags <table> are well provided with a role="presentation "
3- Check the 120dpi :
In principle before the tag I have to find this piece of code:
96The rest of the accessibility also depends on your design.
5- Verify the renderings
2 options:
1- Some well known tools like EmailOnAcid or Litmus provide you with quality tests. Be careful, these very reliable tools are not free. It is useful to see if your email is correct on Darkmode !
You can choose the terminals to test and even send a test directly from your builder.
2- You can send a live test to yourself via https://parcel.io/. Be careful because as a pre-requisite you must know how to host your images either online on tools like https://www.zupimages.net/up.php or on your server. And of course you have to replace the 'src' of each of the tags <img>.
I let you log in to Parcel and click here:
Enter a name to your email and 'enter'. Copy your email code in the middle and click here:
All you have to do is enter your testing addresses.
If possible, know your base and open several test boxes on PC & mobile (Gmail, LaPoste, Outlook, Free, Yahoo, ...). Nothing replaces a real test!
Conclusion
It's very easy to check your HTML kit, whether it's delivered or done on a builder, with just a few clicks and without having a lot of knowledge in code. Here you have the main checkpoints to perform which will already give you an overview of the code, accessibility, rendering and optimization in general.
The tools are easy to use and don't require much time after all. Don't be afraid to get your hands in the engine 😉 So maybe not every time but on new integrations or designs.
I invite you to test one of your kits and send us your impressions, feedback or comments.
And if you have any questions or need a more thorough auditDon't hesitate, you know where to find us.
